How We Automated Shopify Blog Publishing with Google Sheets
..and save yourself from a lifetime of copy-paste suffering.
If you’ve ever managed a Shopify blog, you already know the pain I’m about to describe. A couple of weeks back, we had a conversation with one of our clients.
“We’ve got 15 blog posts ready to go,” they said. “But actually publishing them? That’s a nightmare.”
It was basically a full-time job just to publish.
Forget creativity, forget strategy, they were living inside a never-ending loop of manual work.
The real impact?
Publishing velocity went down.
Content that should’ve gone live today was taking days, sometimes weeks.
And here’s the thing that really got me: they had great content. Their writers were brilliant. The articles were sitting there, ready to go, gathering dust in Google Drive. All because the publishing process was so painful that nobody wanted to do it.
The “Aha” Moment
After that call, I went down a rabbit hole.
“There has to be a way to automate this,” I muttered, opening ChatGPT at 8 PM. Do I regret it? Yes. Did it work? Eventually.
Here’s what I figured out: We could build a system where:
- Writers write in Google Docs (they’re happy)
- Google Sheets acts as a content queue (simple, visual, everyone gets it)
- An app script does all the horrible manual work (beautiful)
- Articles magically appear on Shopify
Sounds simple, no? Took me a day and approximately 7 cups of chai to figure out. (Yes, I am not a “tech” guy, so I had to vibe code with LLMs to create a prototype.)
How the System Actually Works
Step 1: The Content Lives in Google Docs
Your writers keep doing what they’re already good at, “writing in Google Docs.” They can use headings, bold text, links, lists, and all the normal formatting.
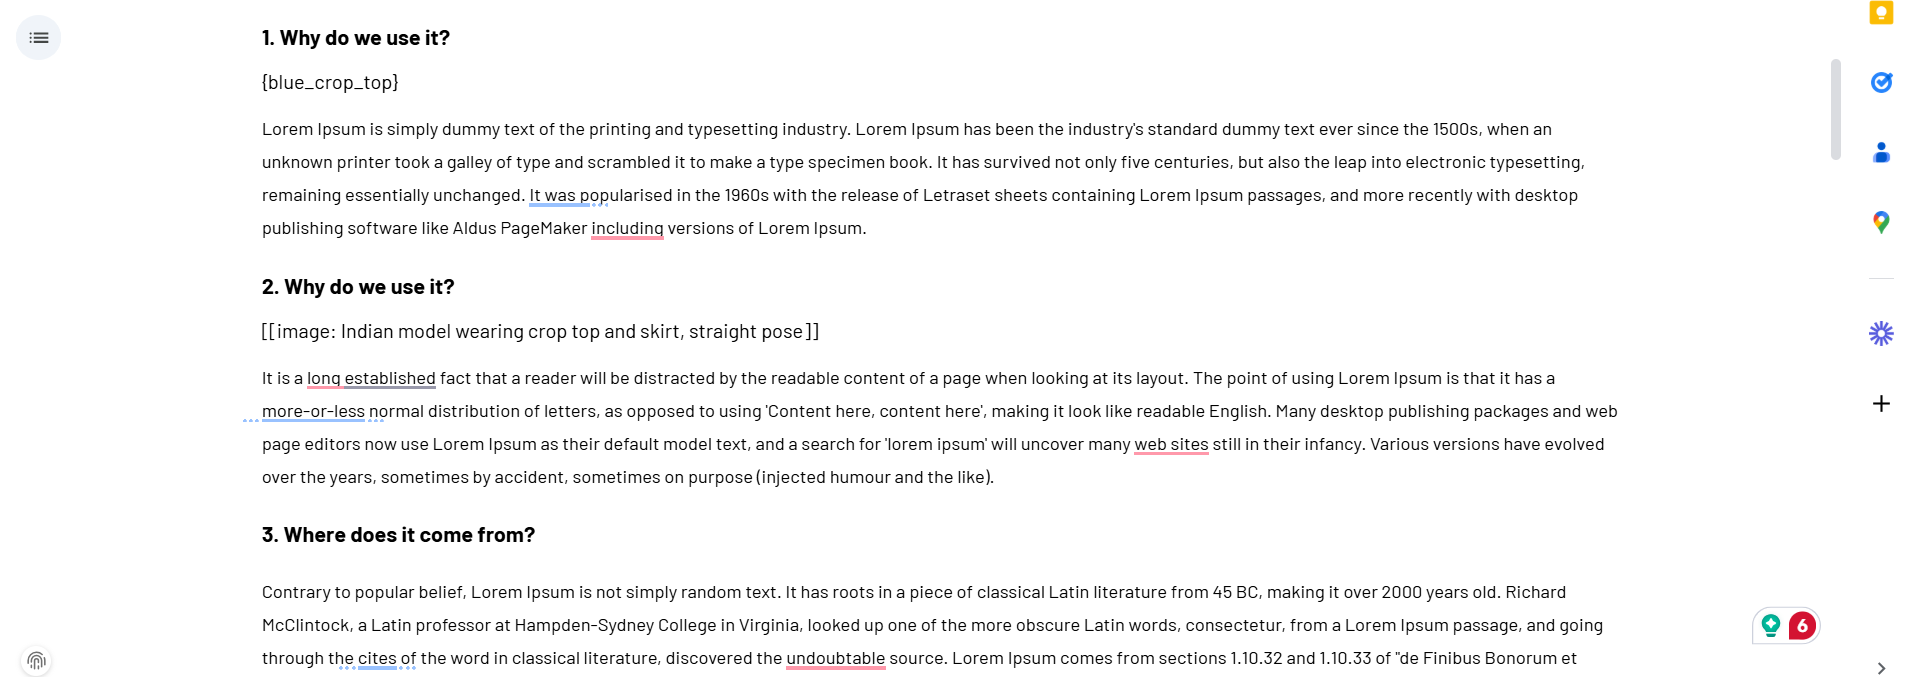
But here’s the clever bit: they can add image placeholders right in the document.
Want an AI-generated image of a model wearing a top? Just type:
[[image: Indian model wearing crop top and skirt, straight pose]]
Already have a product image you want to use? Type:
{blue_crop_top}
That’s it. The writer doesn’t download anything, doesn’t open ChatGPT, doesn’t upload anything. Just writes and adds placeholders.
Here’s how the Google doc would be:
Step 2: Google Sheets Becomes Your Content Queue
Create a Google Sheet with two tabs: “Posts” and “Images.”
In the “Posts” sheet, you track:
- Link to the Google Doc
- Article title
- URL slug for Shopify
- Status (this is the magic column)
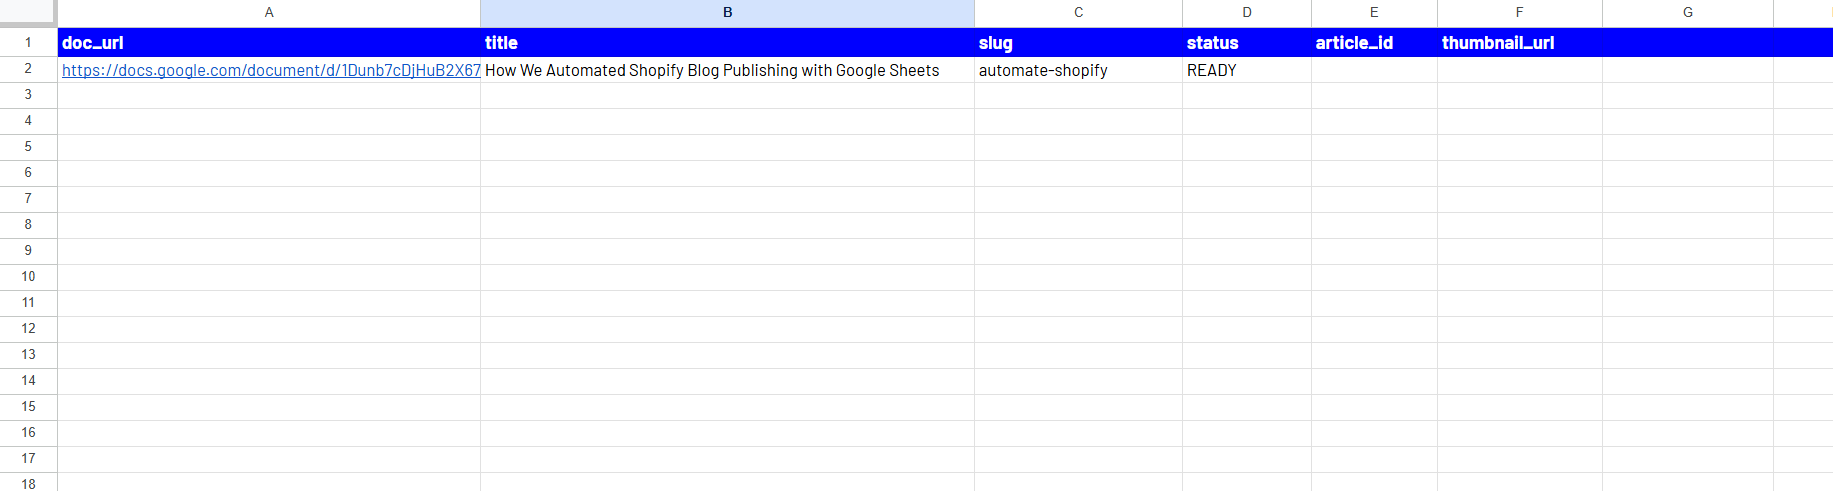
When you’re ready to publish, you just change the status to “ready.” That’s your publishing trigger.
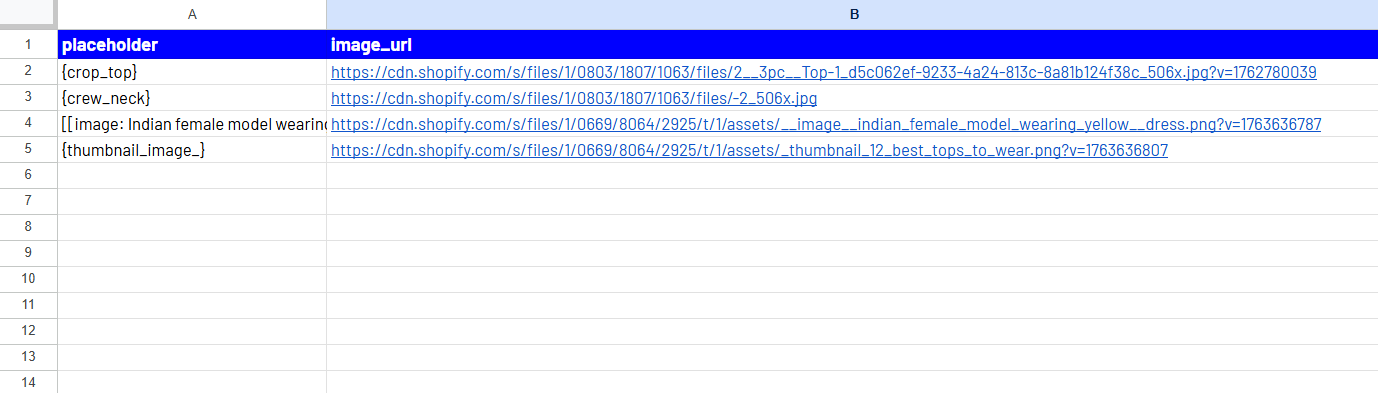
The “Images” sheet does two things;
- It is where the script stores all the generated images and their Shopify CDN links. Think of it as your image library that builds itself over time.
- It is where the users can also add existing images that you can reuse in your article.
Step 3: The Script Does All the Horrible Work
Right, this is where the actual magic happens.
I wrote a Google Apps Script with GPT’s help that:
- Reads your Google Doc and extracts all those image placeholders you added.
- Generates images via OpenAI’s DALL-E API. For each placeholder, it sends a prompt to DALL-E, gets back a gorgeous AI-generated image. I added some styling prompts by default (studio lighting, white background, that sort of thing) so everything looks consistent and professional.
- Uploads every image to Shopify’s CDN. This was the trickiest bit. OpenAI gives you temporary URLs that expire. Useless for a blog post. So the script downloads each image, converts it to base64, and uploads it to Shopify as a permanent asset. Now you’ve got permanent CDN links that’ll work forever.
- Converts your Google Doc to clean HTML. Headings become <h1>, <h2> tags. Bold text becomes <strong>. Links stay as links. Lists become proper HTML lists. It even handles tables like a charm.
- Replaces all those placeholders with actual image tags. Remember ?{crop_top}? That becomes <img src=”https://your-store.myshopify.com/cdn/crop_top.jpg”>. Same for all the AI-generated images.
- Publishes everything to Shopify. Article, images, featured thumbnail, slug—everything. Through Shopify’s API, the process is completely automated.
- Updates your sheet. Changes the status to “published,” adds the Shopify article ID, and stores the thumbnail URL. So you have a record of everything.
The entire process takes about 30 seconds per article. Down from hours.
Setting It Up (I Won’t Lie, There’s Some Technical Faff)
Right, I need to be upfront with you. This isn’t a “click one button and magic happens” solution. You’ll need to do some setup. But I promise it’s worth it.
Getting Your Shopify Credentials
You need three things from Shopify:
- Your store URL (the yourstore.myshopify.com bit)
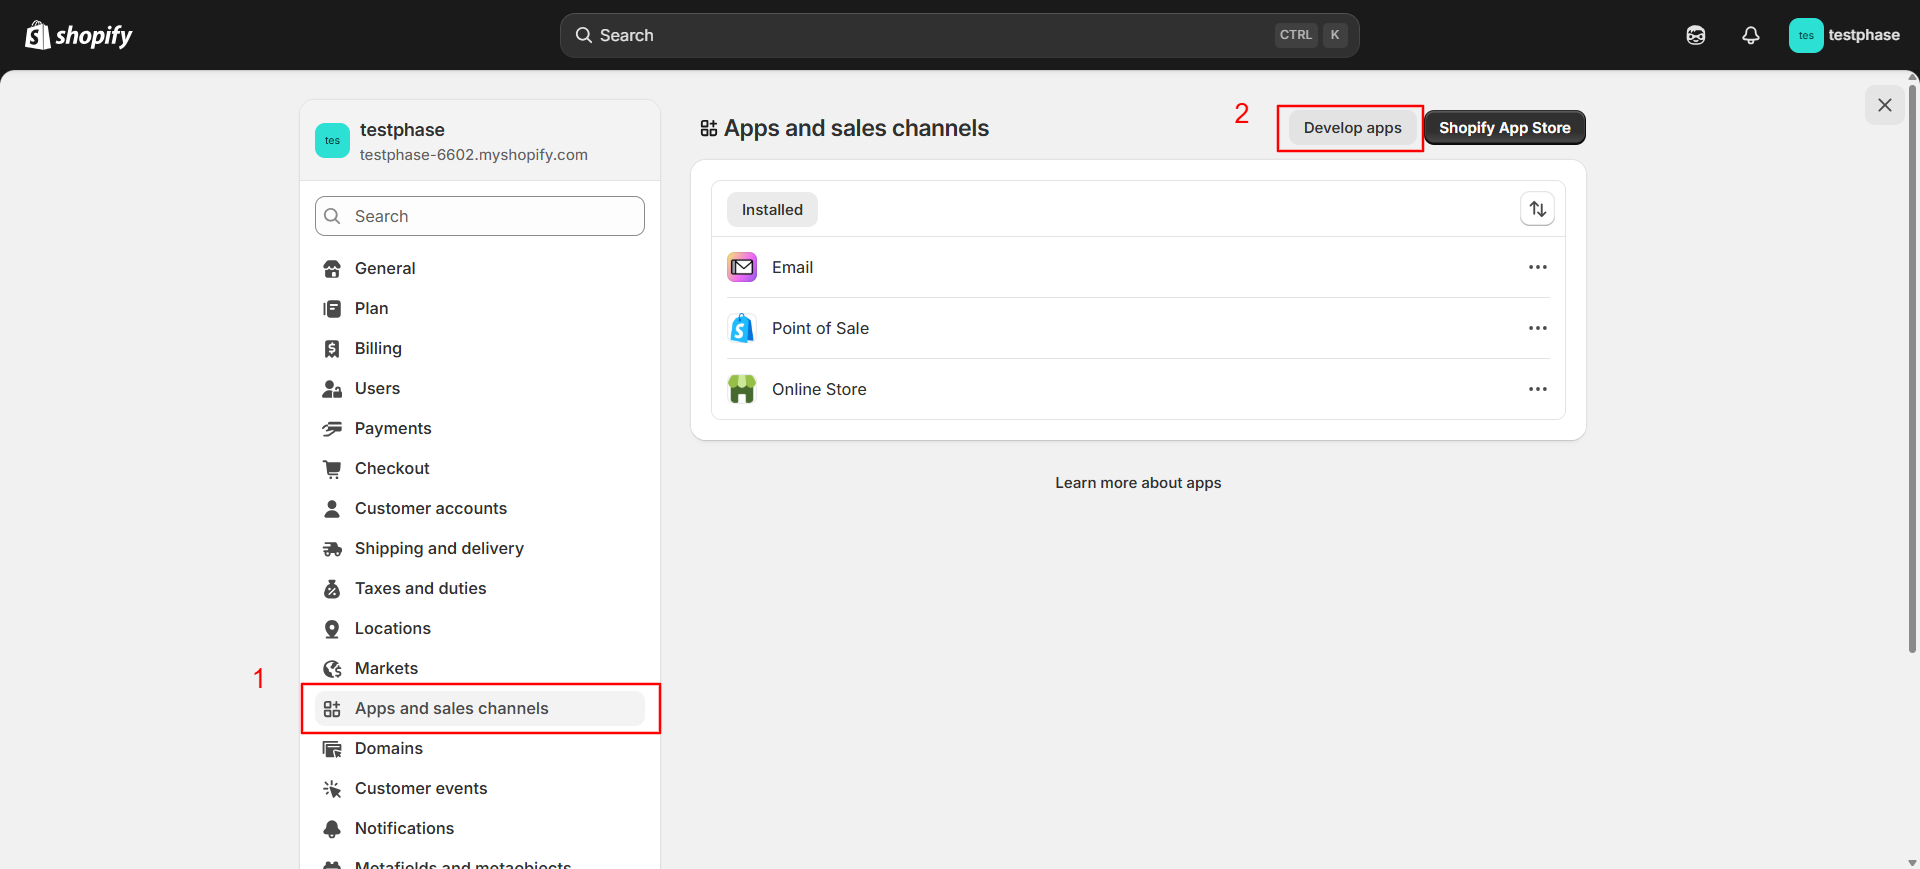
- An API access token (go to Settings → Apps and sales channels → Develop apps)
- Your blog ID (it’s in the URL when you’re viewing your blog in Shopify admin)
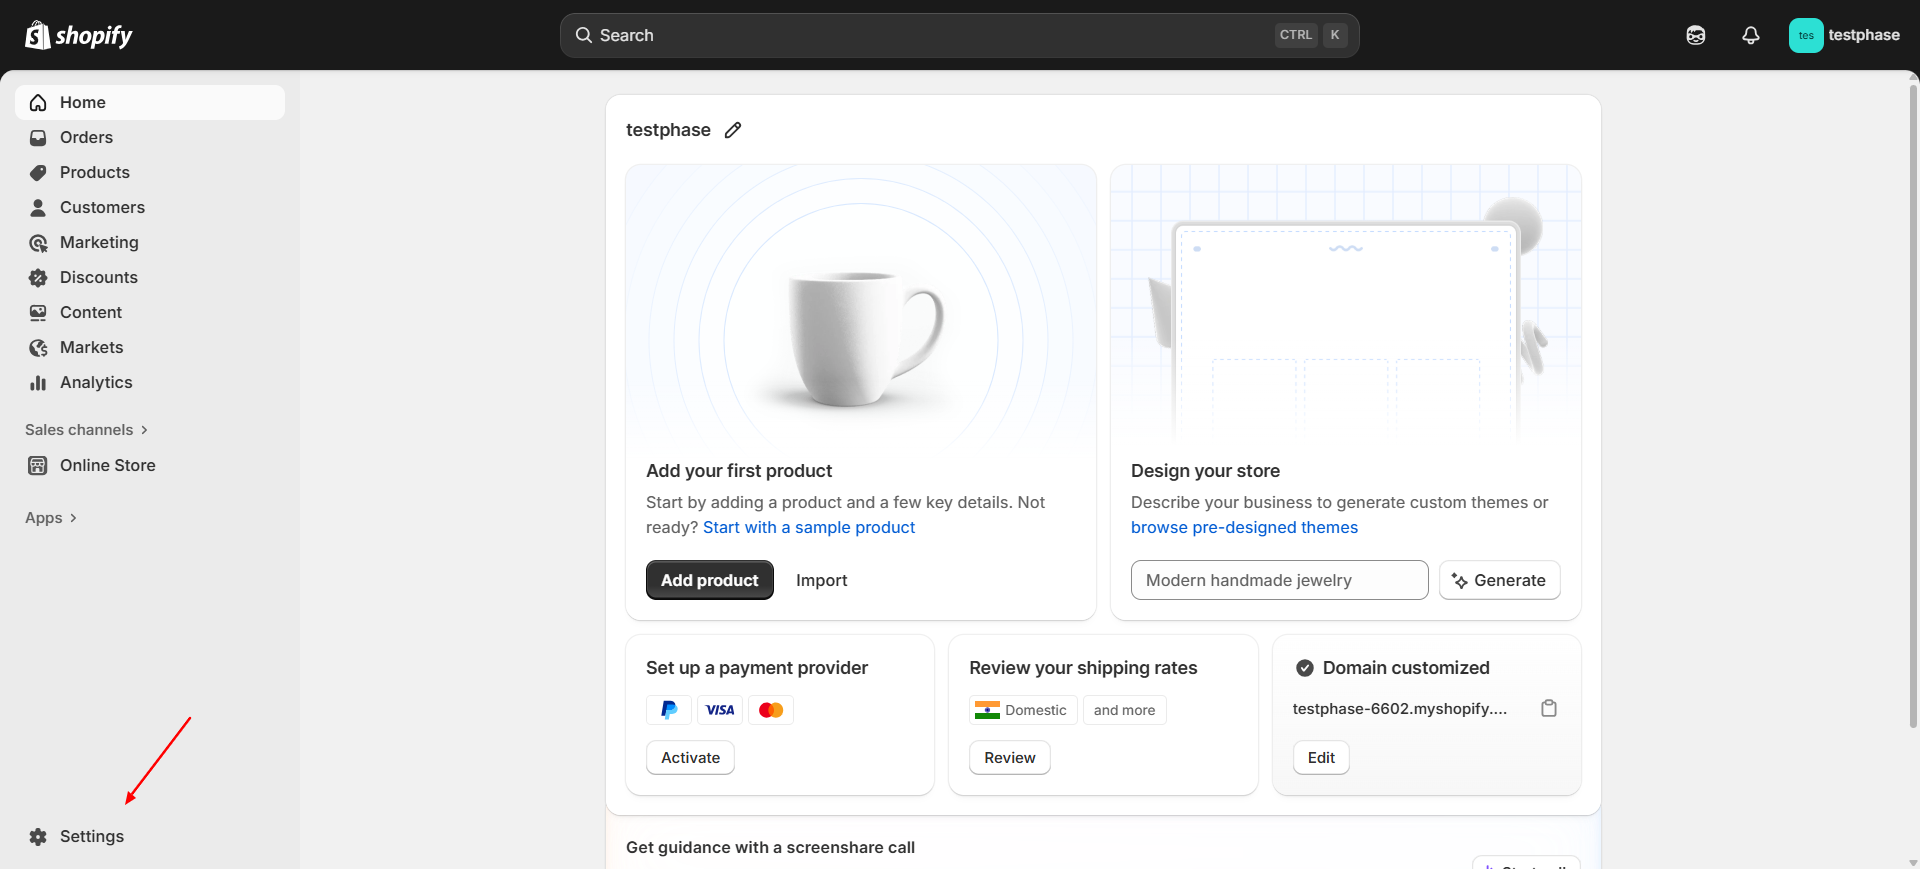
Go to the Settings page:
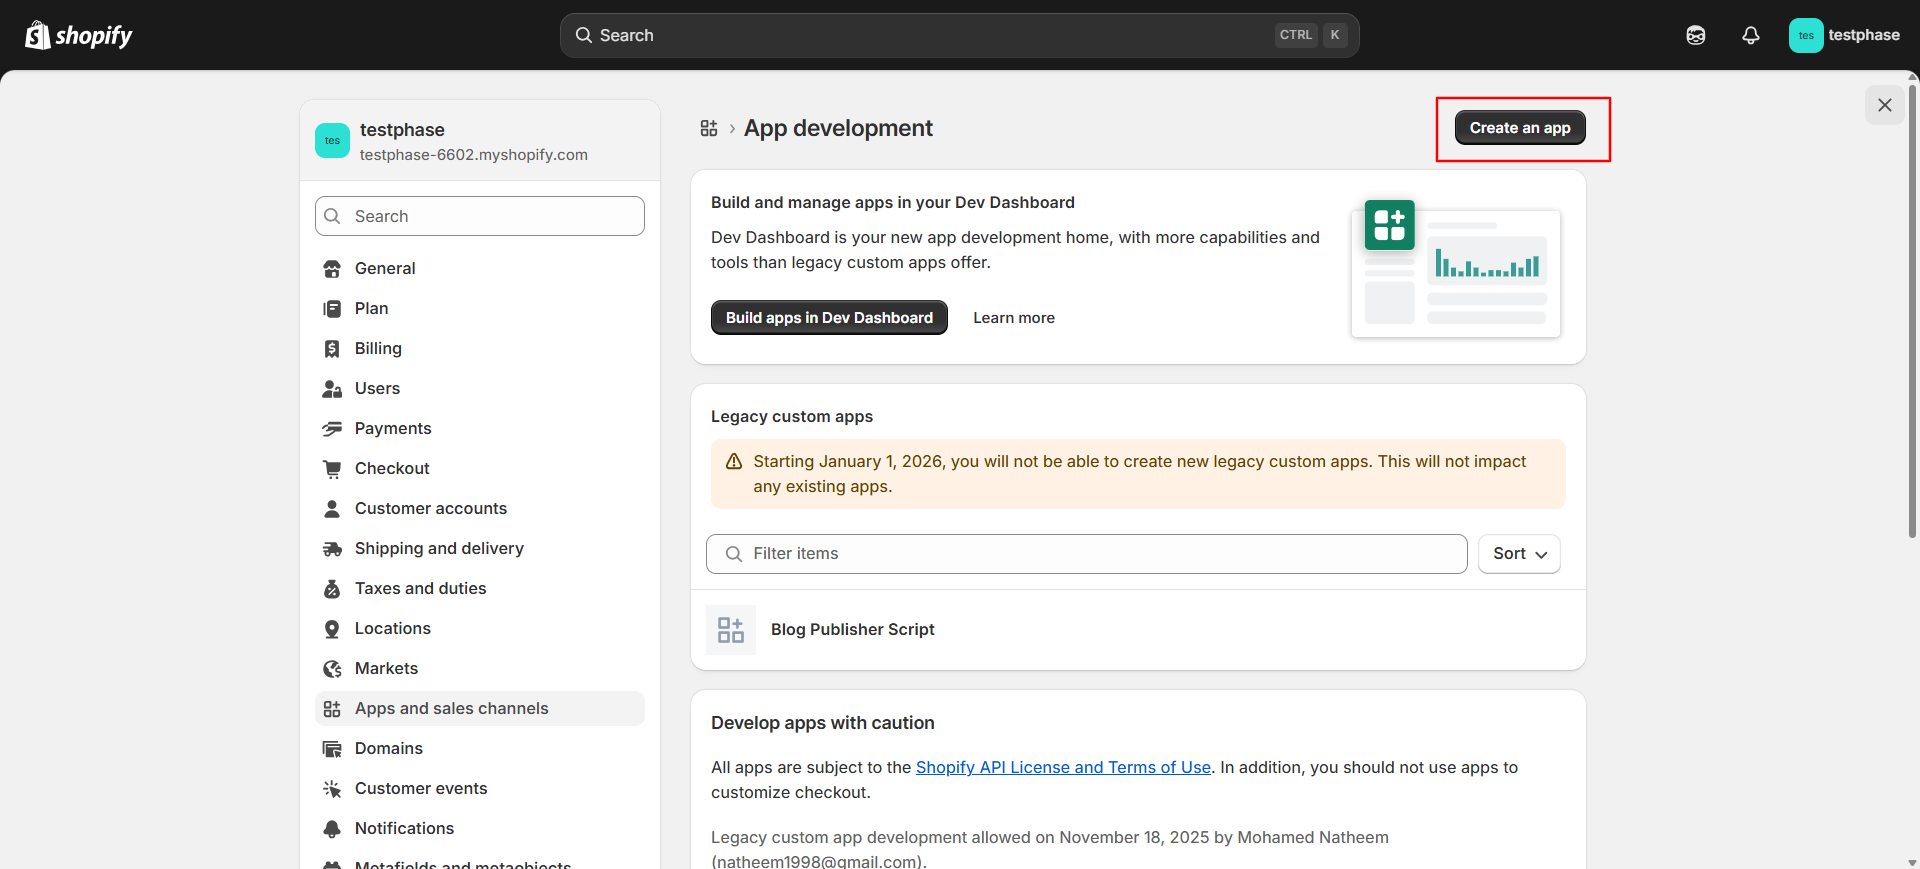
Go to “Apps and sales channels” page and click on “Develop apps”:
Click on “Create an app”:
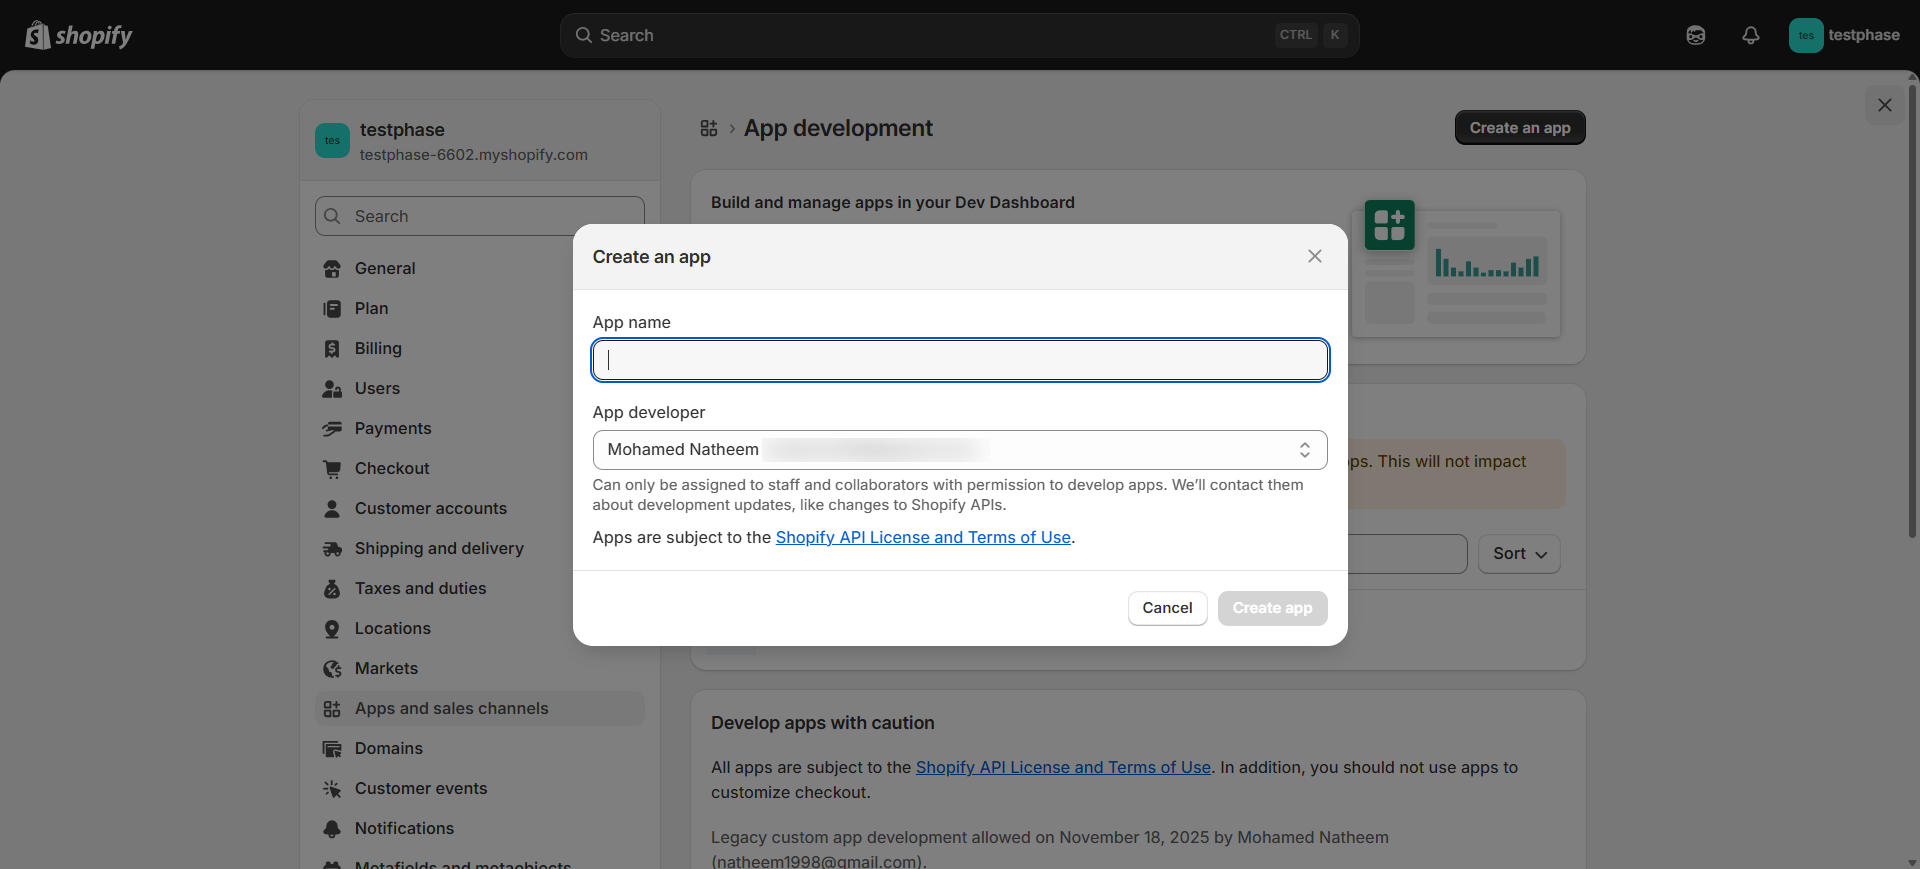
Give the custom app a name:
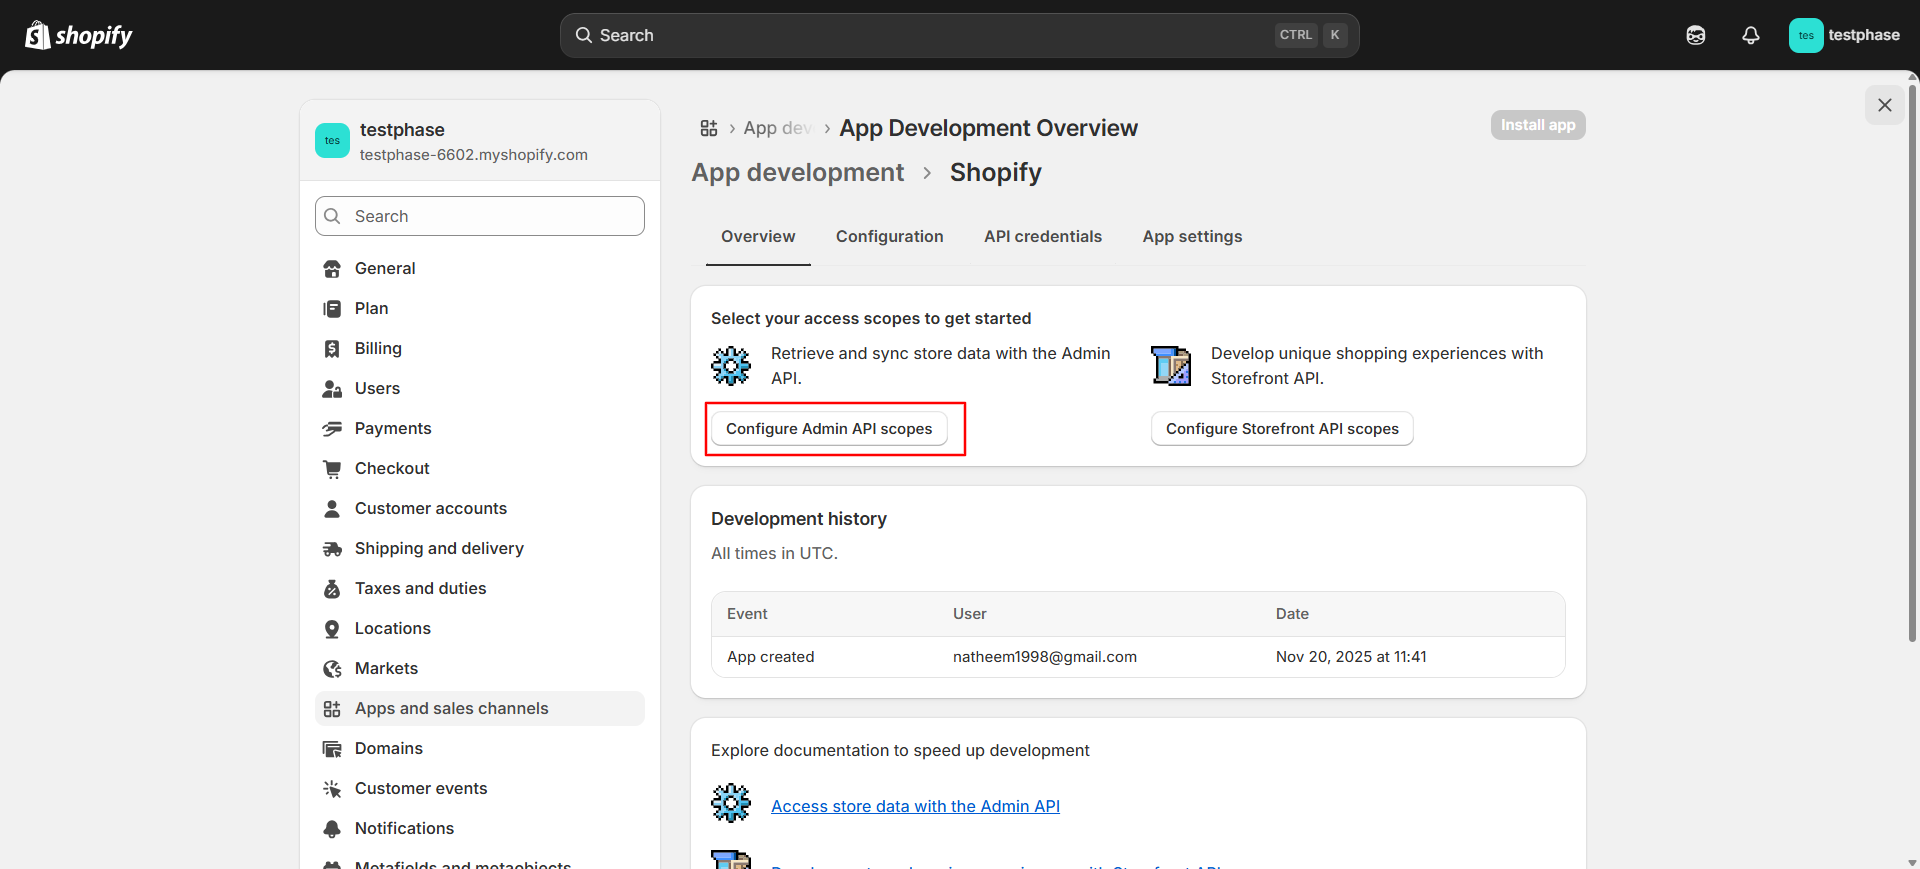
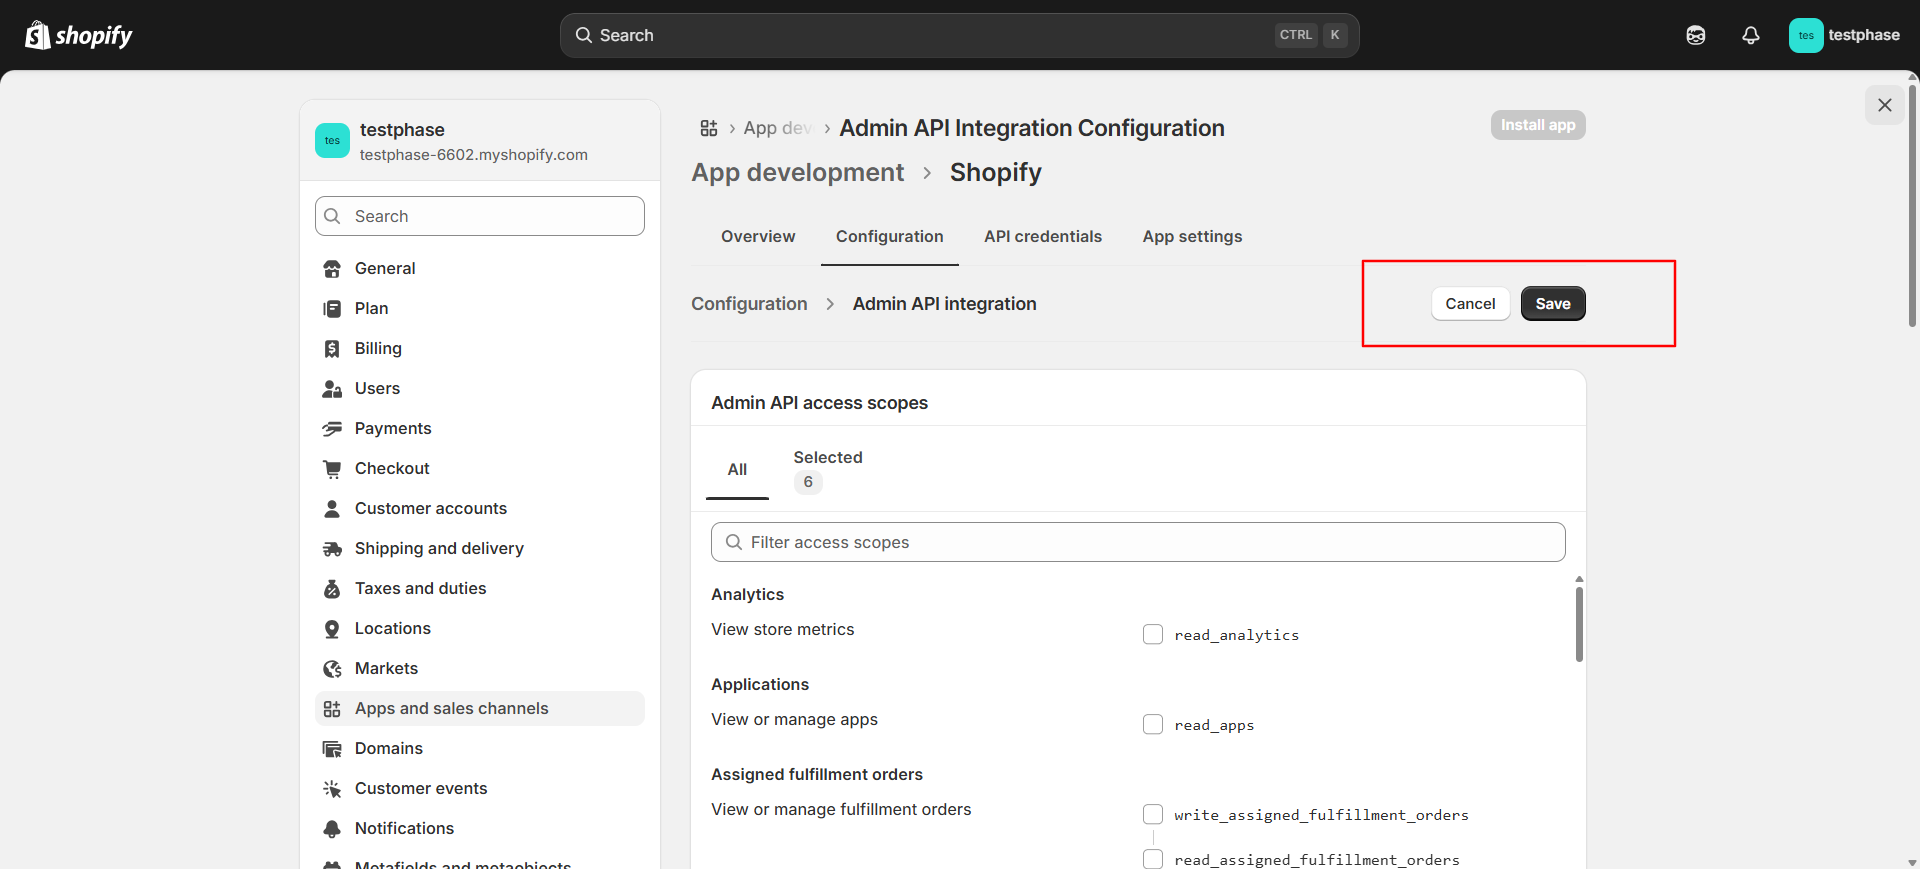
Add access scopes for the API:
Add the following scopes to the API:
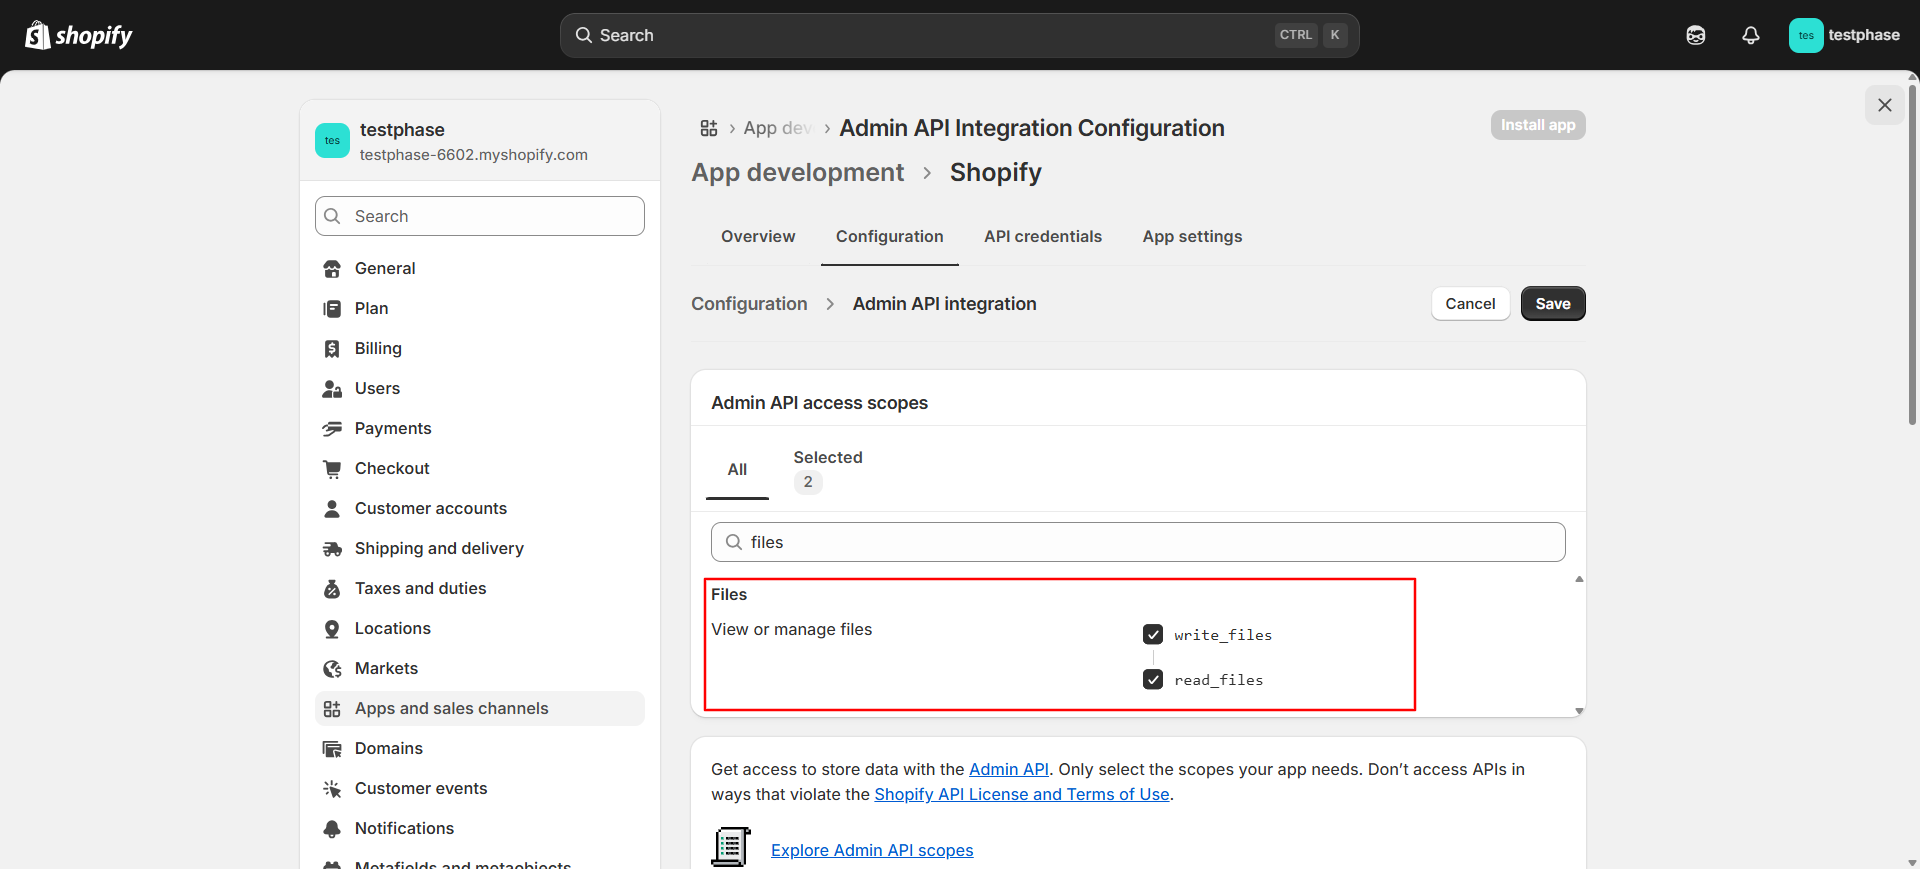

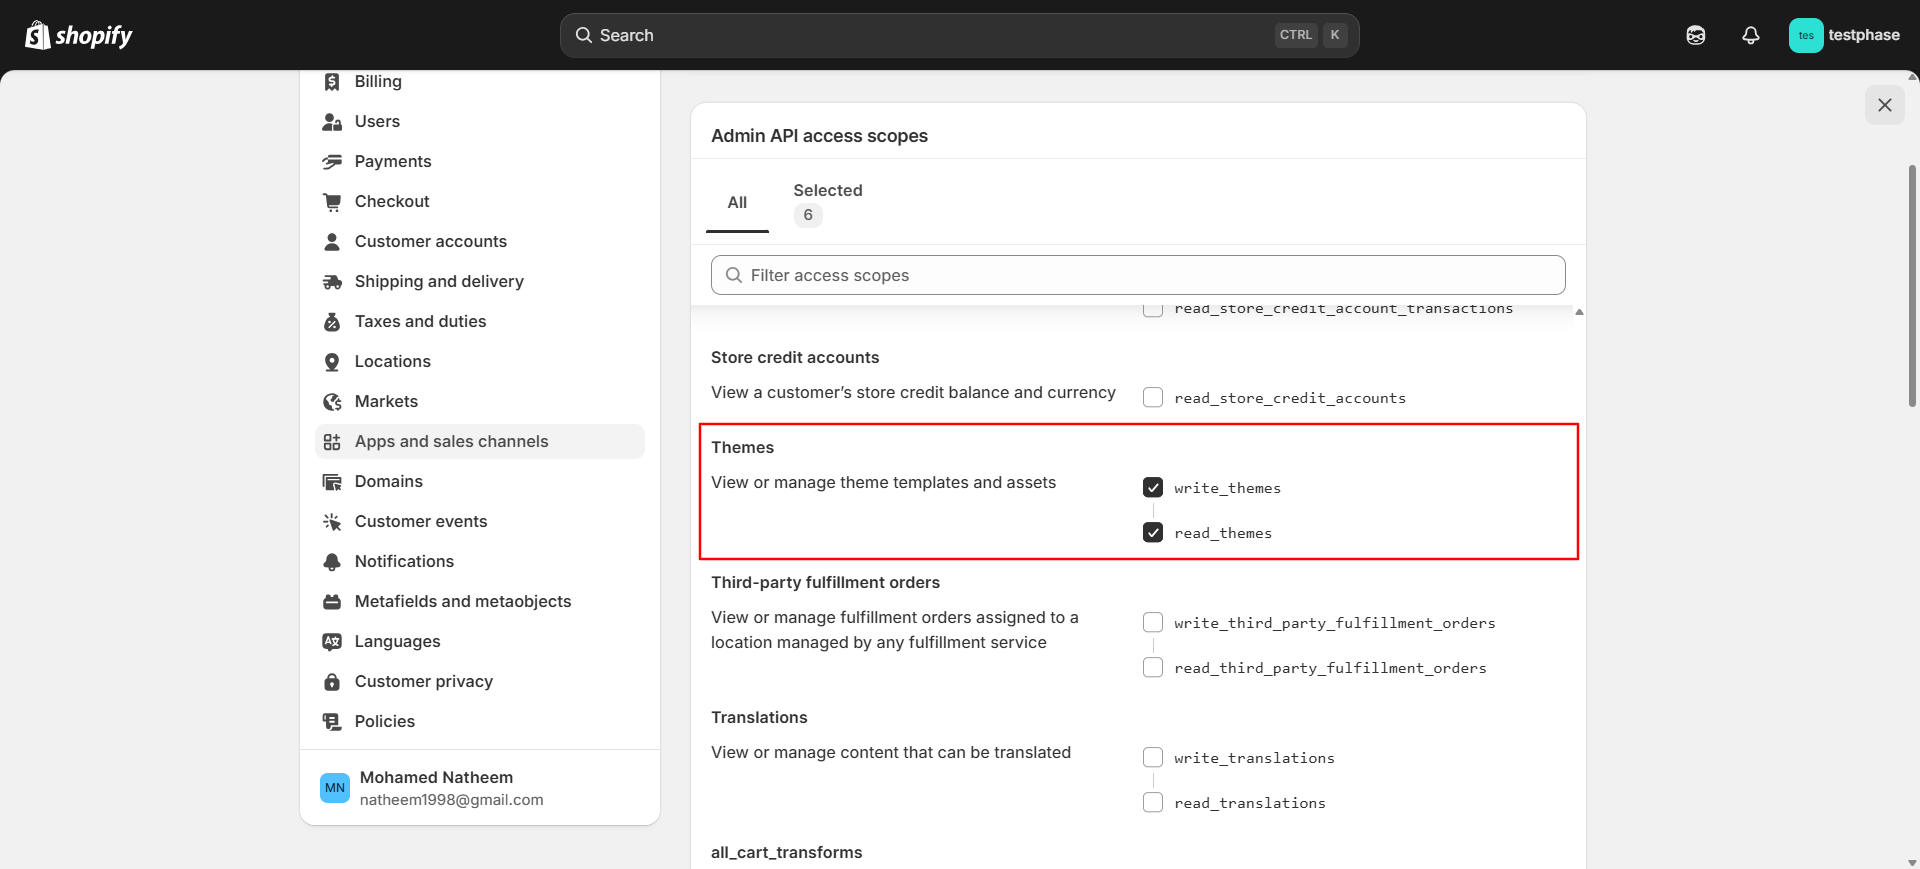
Click Save.
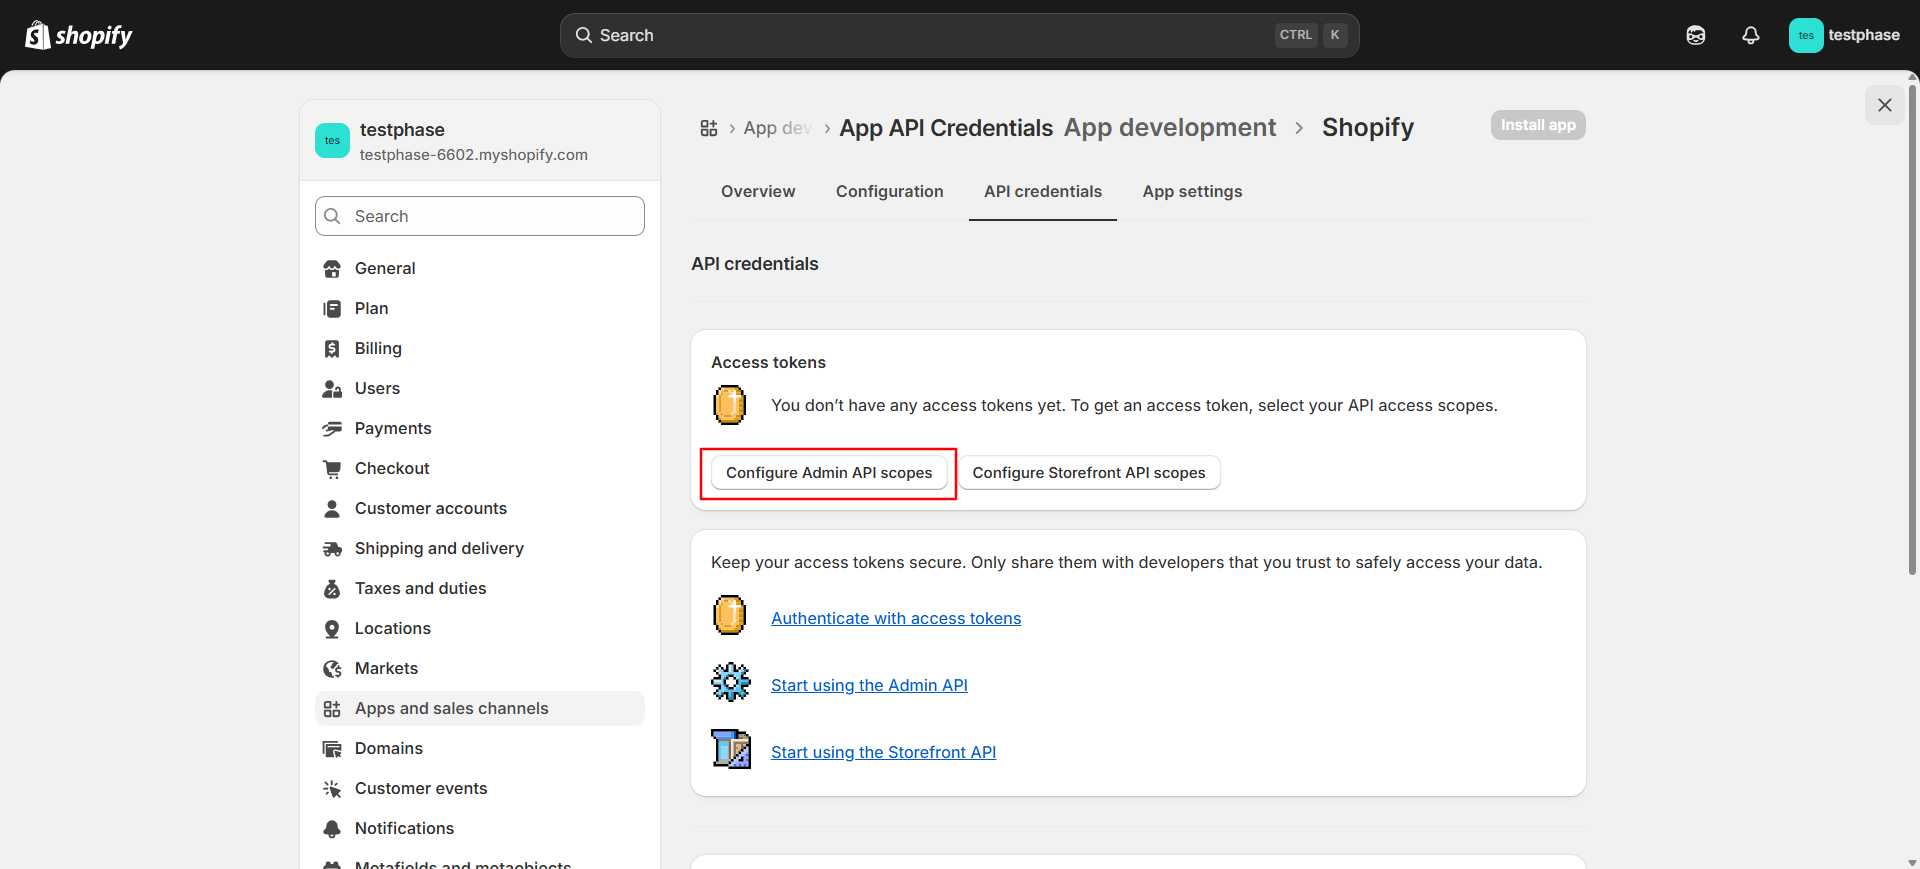
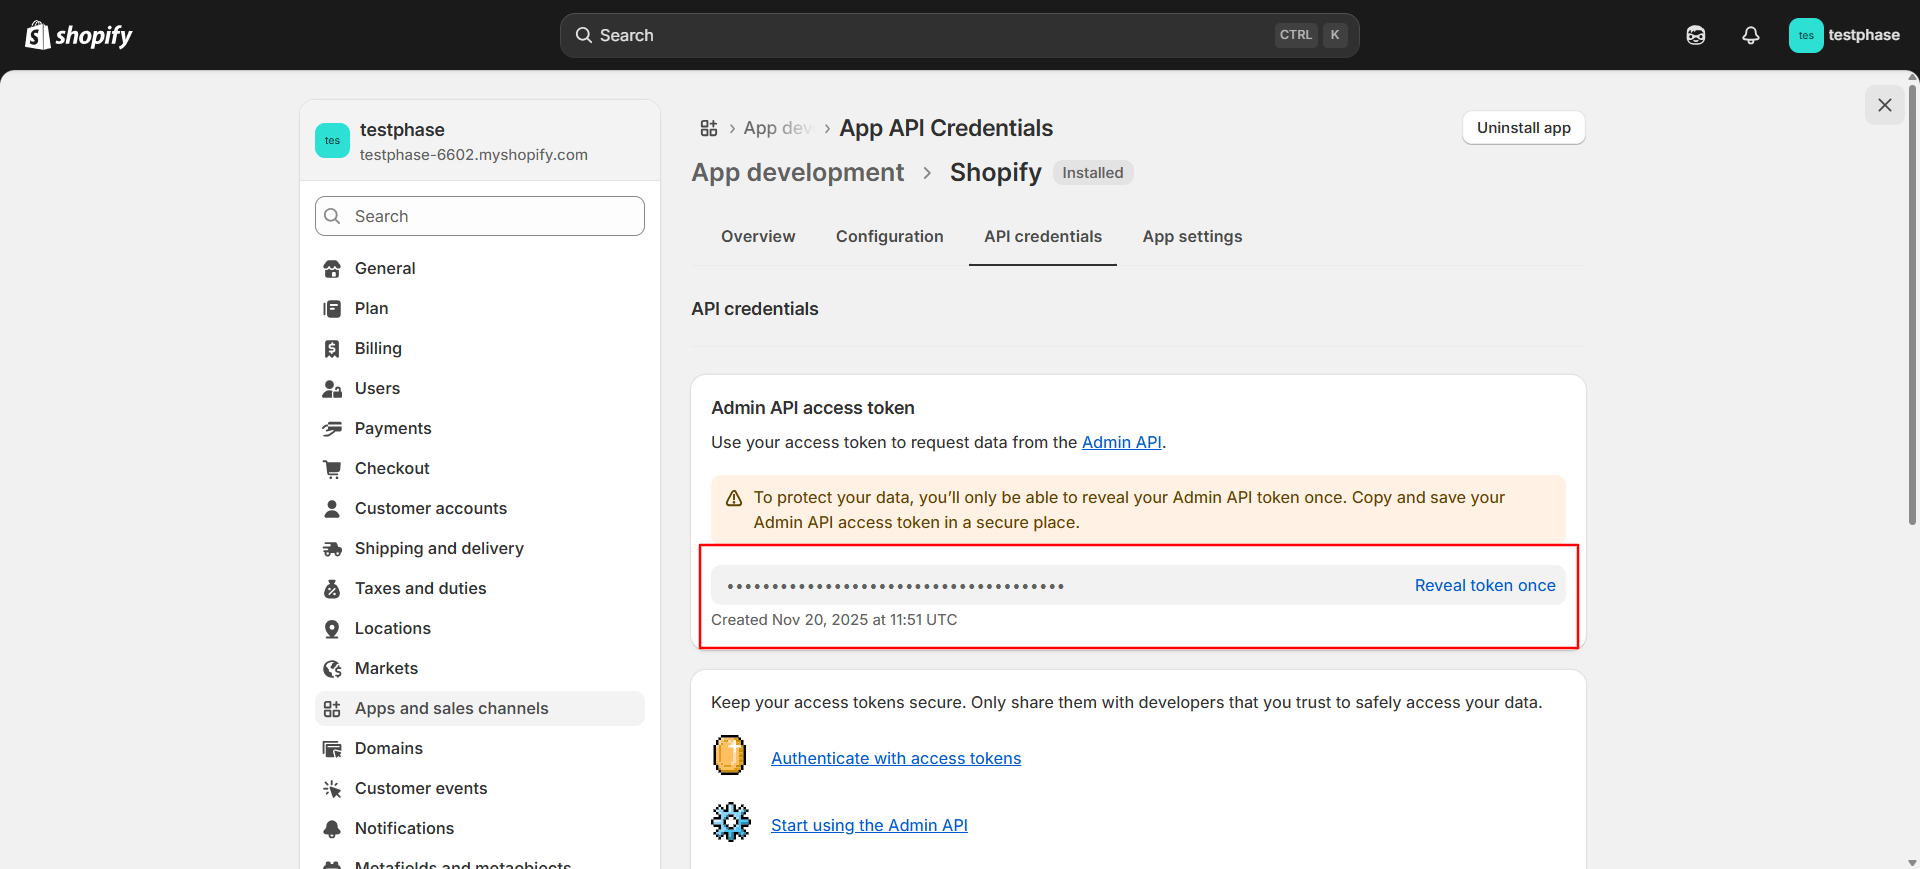
Get the “Access Token”:
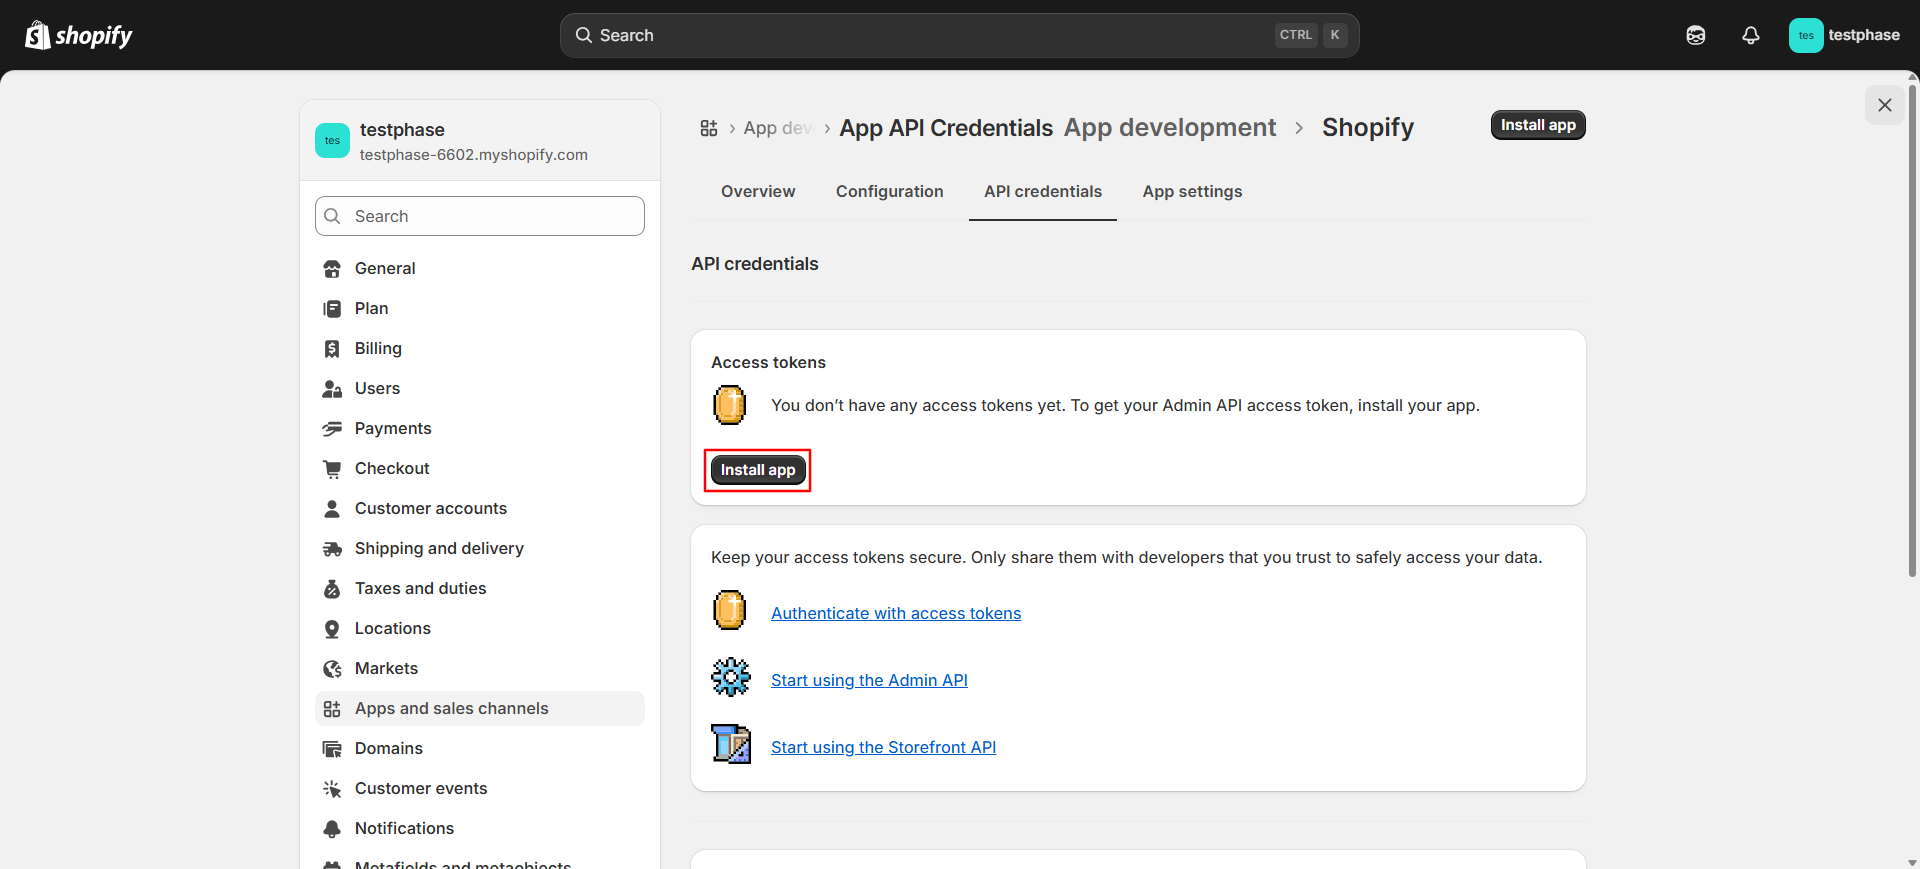
Save the token somewhere safe and copy it:
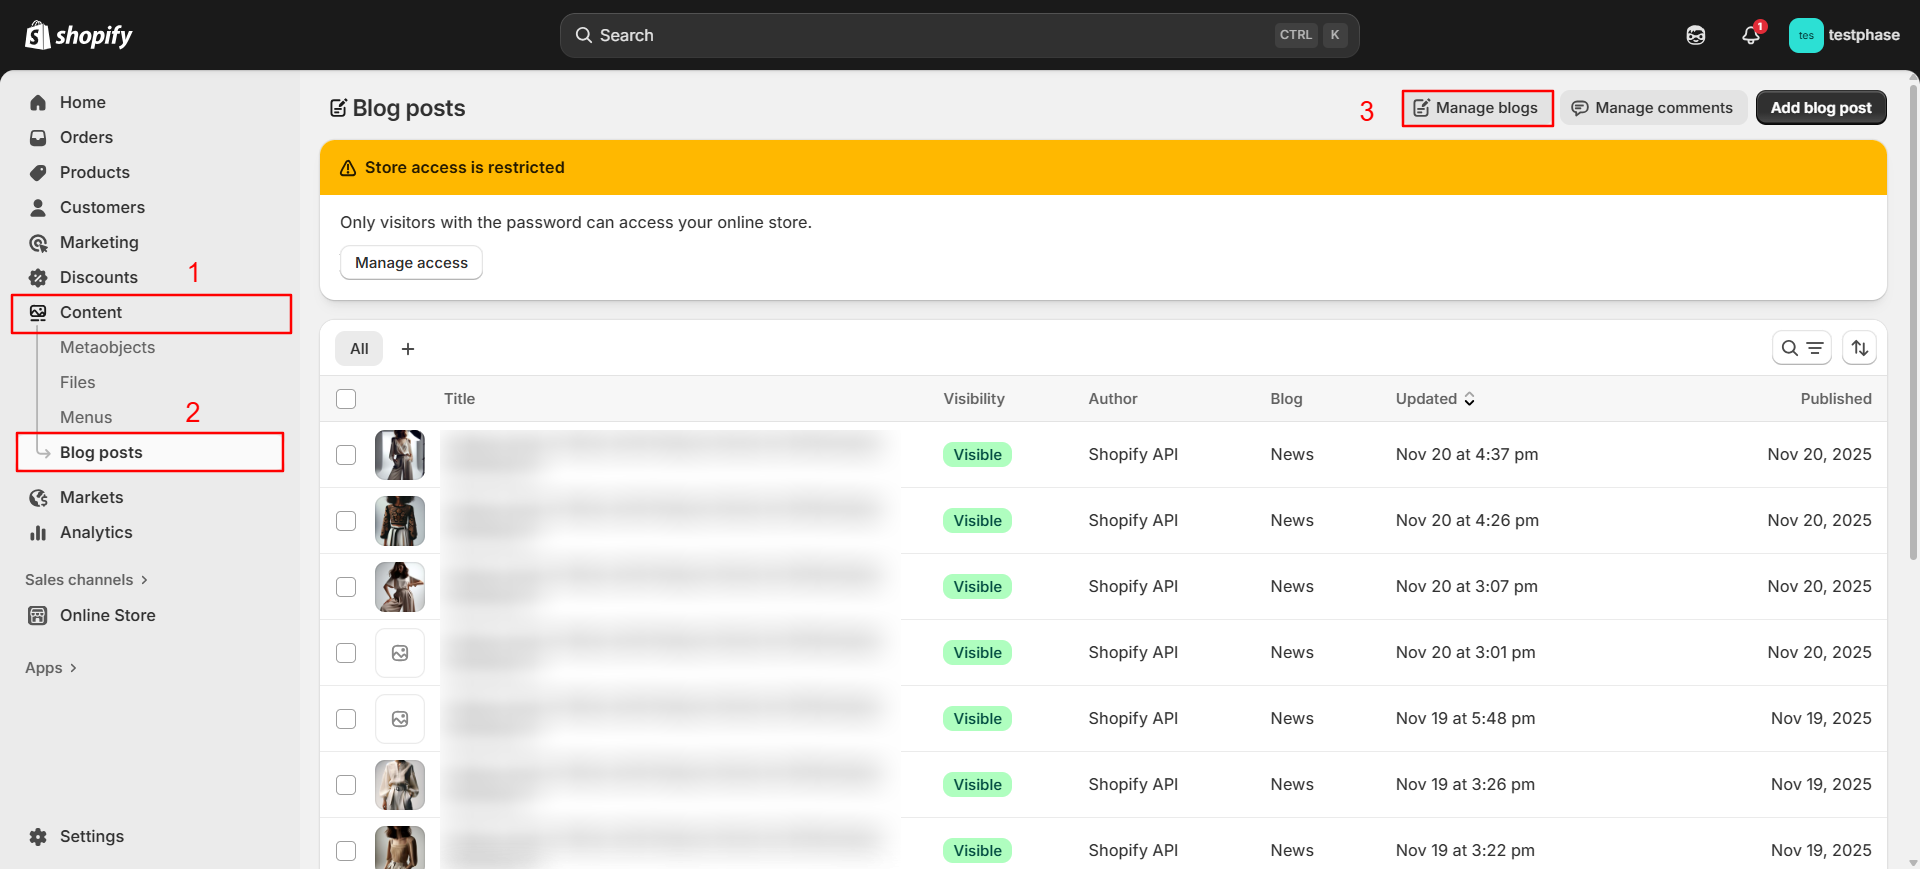
Now, let’s get the “Blog ID”:
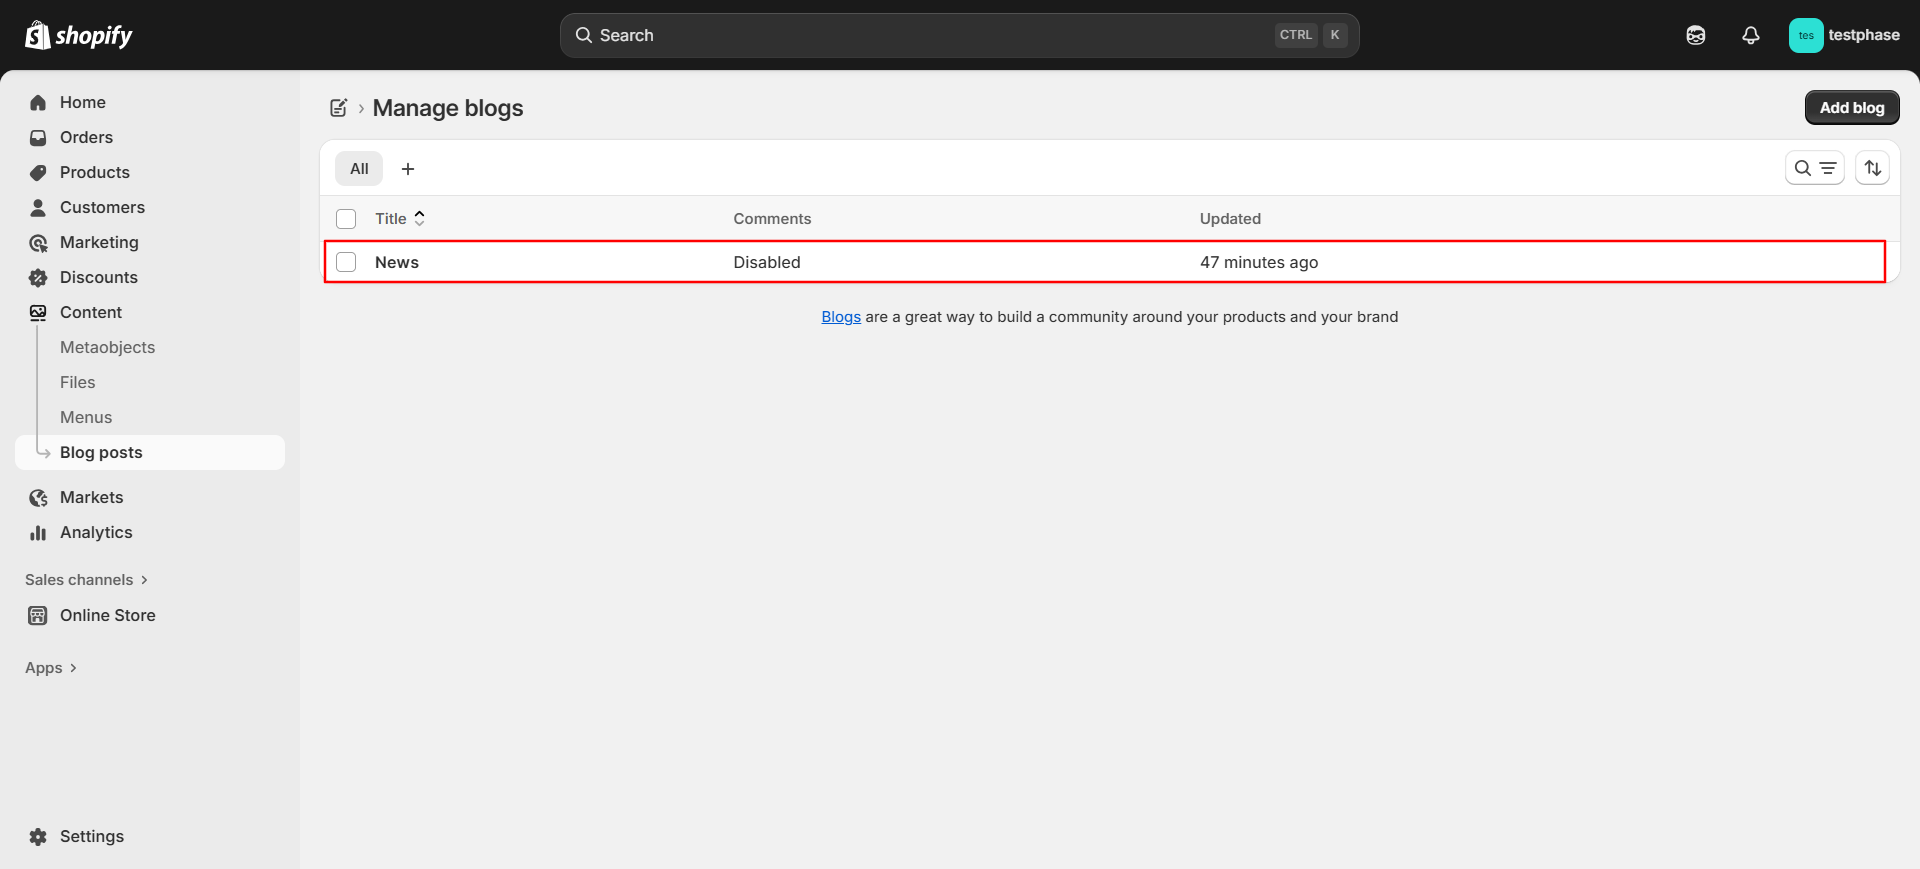
Choose the category you want to publish the articles in:
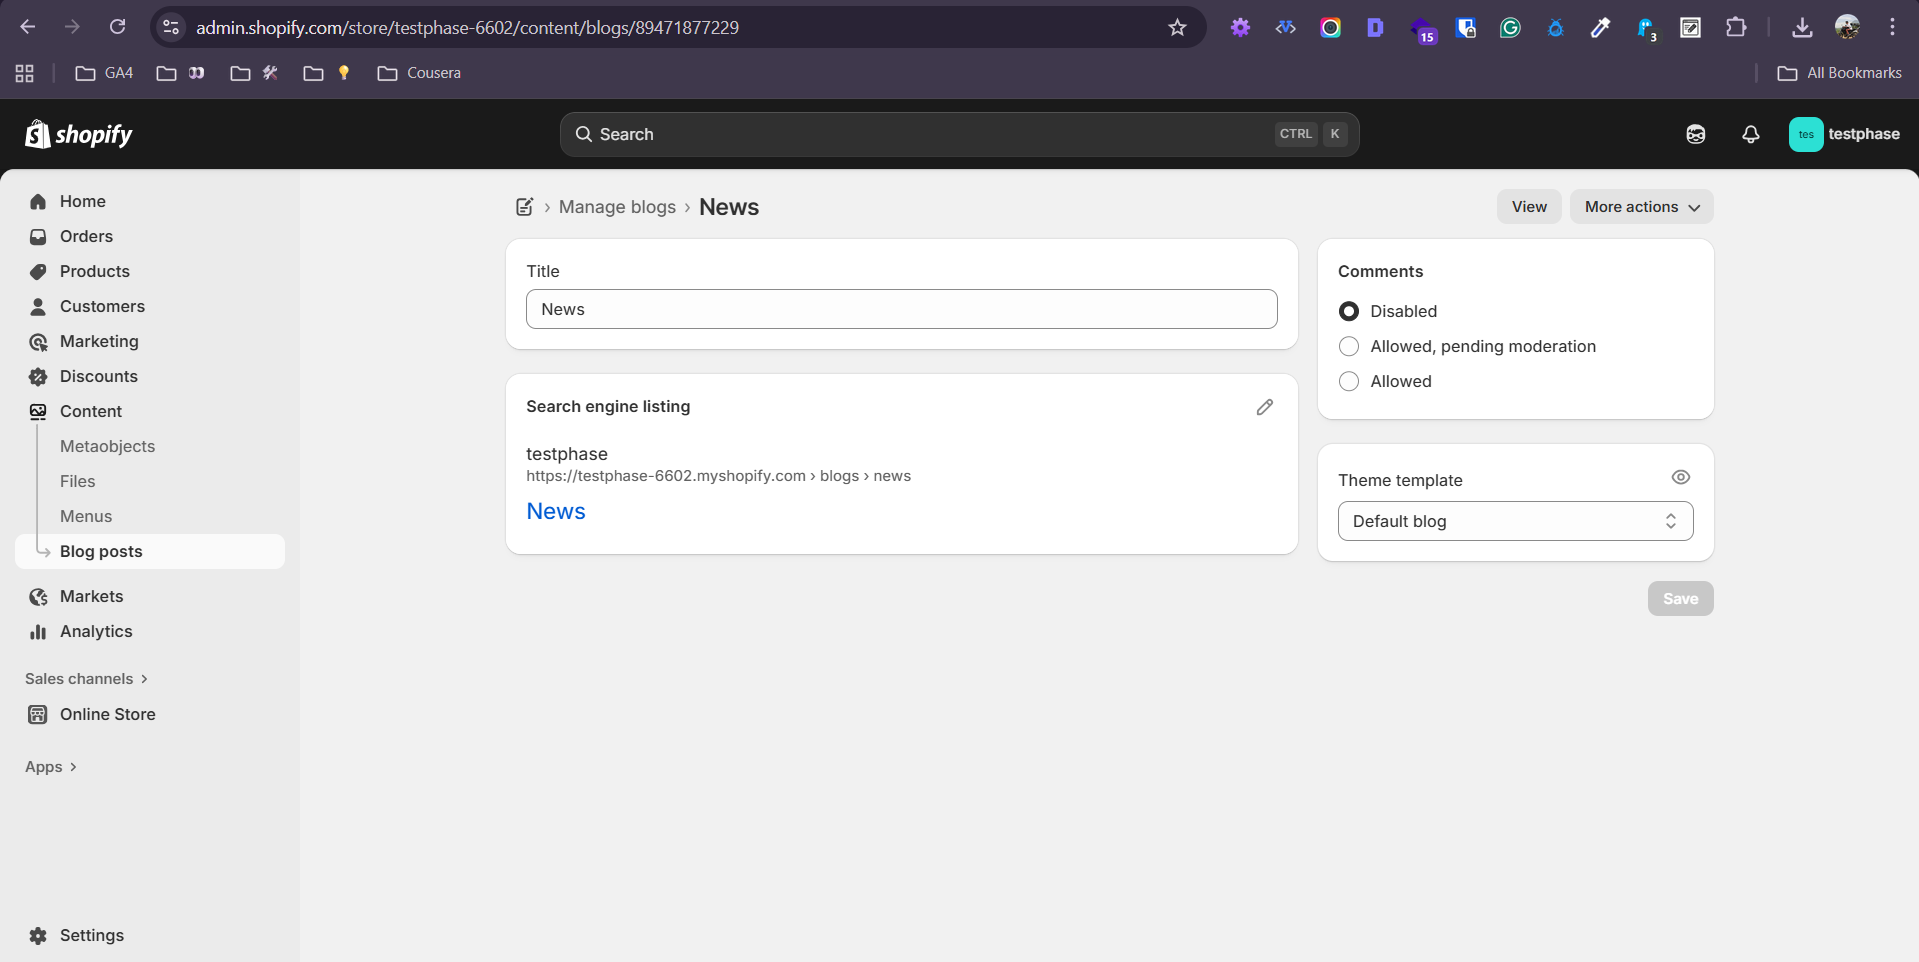
Copy the blog ID that comes after /content/blogs/ from the URL:
In this case, the blog ID would be: 89471877229
Getting Your OpenAI API Key
Head to OpenAI’s platform, sign up if you haven’t, and generate an API key. This is what lets you generate images through DALL-E.
The Actual Code
You can get the entire appscript from this Google doc.
The code handles everything else: image generation, uploading, HTML conversion, and publishing.
Just go to Extensions -> App Script -> Paste the code -> And click run.
Testing Without Breaking Everything
Please, for the love of all that is holy, test this on a draft blog first.
Create a test article in your Sheet, set the status to “ready,” run the script, and watch it work. Check the published article on Shopify. Make sure images loaded correctly. Verify the formatting looks good.
Once you’re confident, unleash it on your real content queue.
The Bits That Could Trip You Up
Let me save you from the mistakes I made:
Rate limits are real. Both Shopify and OpenAI have rate limits. The script includes a half-second delay between articles to avoid hammering Shopify’s API. If you’re publishing 50 articles at once, maybe do it in batches.
Image prompts matter. The default prompts I wrote work well for fashion/lifestyle content (neck to knee, no face, white background). If you’re in a different niche, you’ll want to customise the prompt prefixes and suffixes in the code.
The Images sheet grows over time. Every generated image gets logged there. It’s actually quite useful—you can reuse images across articles by referencing the same placeholder. But after a few months, you might want to archive old entries.
DALL-E occasionally generates weird stuff. It’s AI, after all. Maybe 1 in 20 images will be a bit off. Check your published articles and regenerate if needed.
Google Docs formatting has limits. The script handles headings, bold, italic, links, lists, and tables. But if you’re doing something fancy with text colours or custom fonts, it won’t survive the conversion. So, you can play around with altering the script to your needs.
Was It Worth It?
Absolutely. No question.
Could we have hired someone to do the manual work? Sure. But they’d still be spending hours every week on repetitive tasks. This way, the humans focus on writing and strategy, and the robots handle the tedious bits.
Plus, and I’ll admit this is the engineer in me talking, there’s something deeply satisfying about building a system that just works. You set it up once, and then it quietly does its job in the background, forever.
If you’re sitting on a pile of great content that’s not getting published because the process is too painful, maybe it’s time to let Google Sheets do the heavy lifting. Trust me, your future self will thank you, probably over a cup of chai that’s still hot for once.